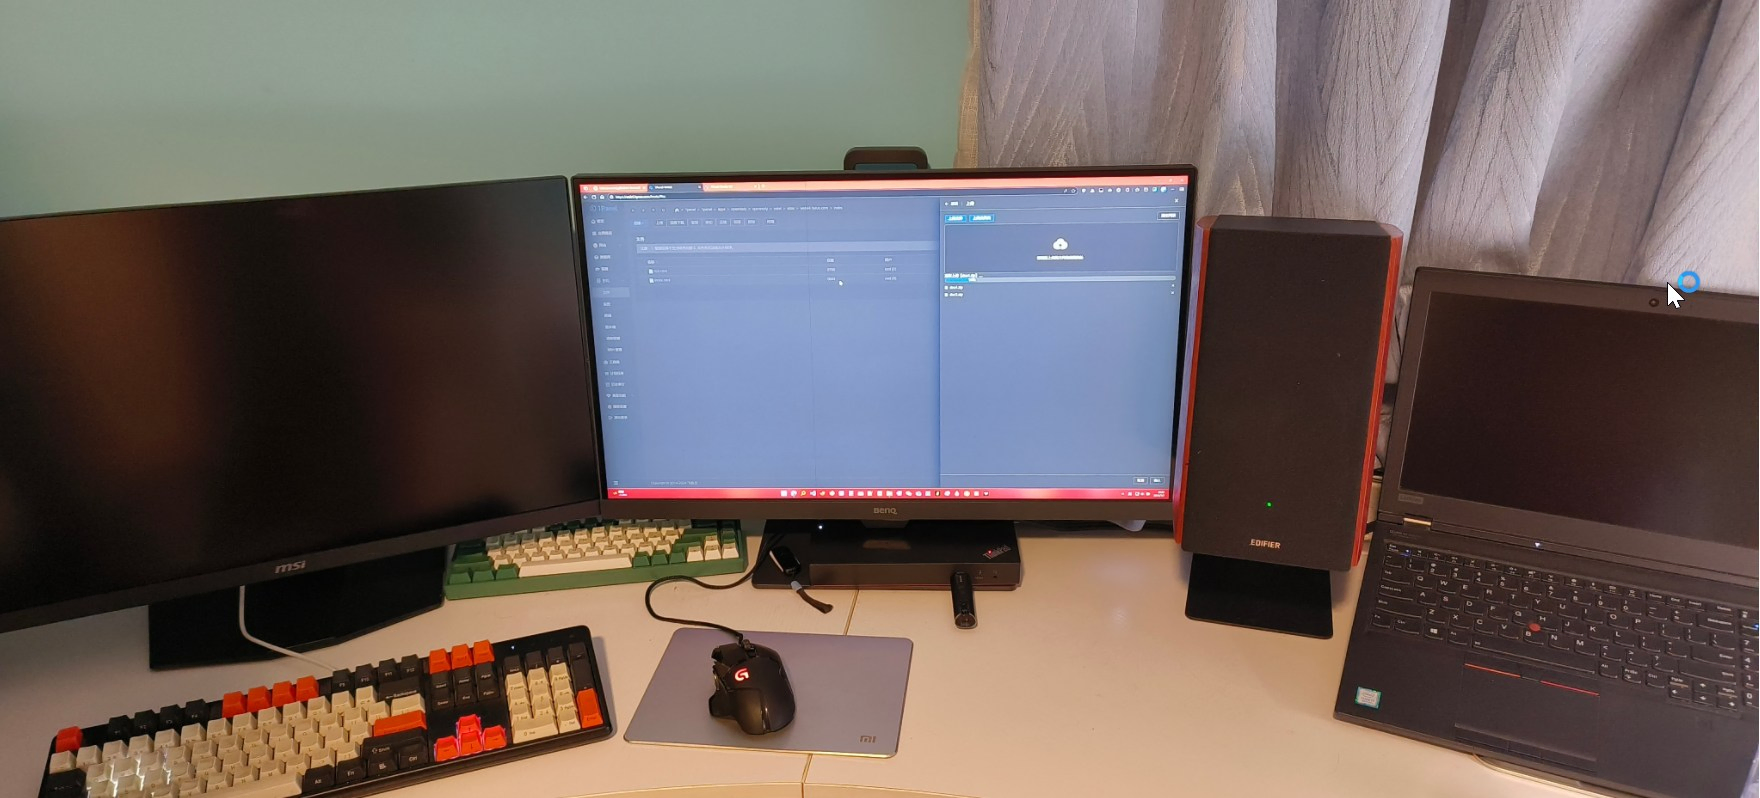
My computer desk sits in a room with irregularly shaped walls—three straight walls and one curved wall by the window. The desk was custom-made to fit this curvature, so the desktop is flush against the wall. Unlike standard office desks, I can’t just let cables dangle behind it, resulting in a cable management disaster.
Previous Cable Management Approach
Previously, I hardly gave any thought to cable management. I simply tossed all the cables behind the monitor, out of sight, out of mind.

But this method became impractical after I bought a “seaview” PC case.
This case comes with 15 fans by default. Even after removing 8 intake/exhaust fans, there are still 7 left: 3 for the CPU liquid cooler, 3 for the GPU, and 1 for the power supply. The low-frequency noise from these fans is quite noticeable.
Given this, I could no longer place the case on the desk as I did with my old ITX build. It had to go under the desk.
This small change created a huge cable management nightmare.
Cable Connection Requirements
After a rough count, there are currently over 30 cables on the desk that need to be connected.
The relationships between these cables are complex, with about 7 connection points where cables go in and out. Managing all this in such a confined space is incredibly challenging.
Considering future GPU upgrades, I might need to connect two computers to two monitors, which means even more cables.
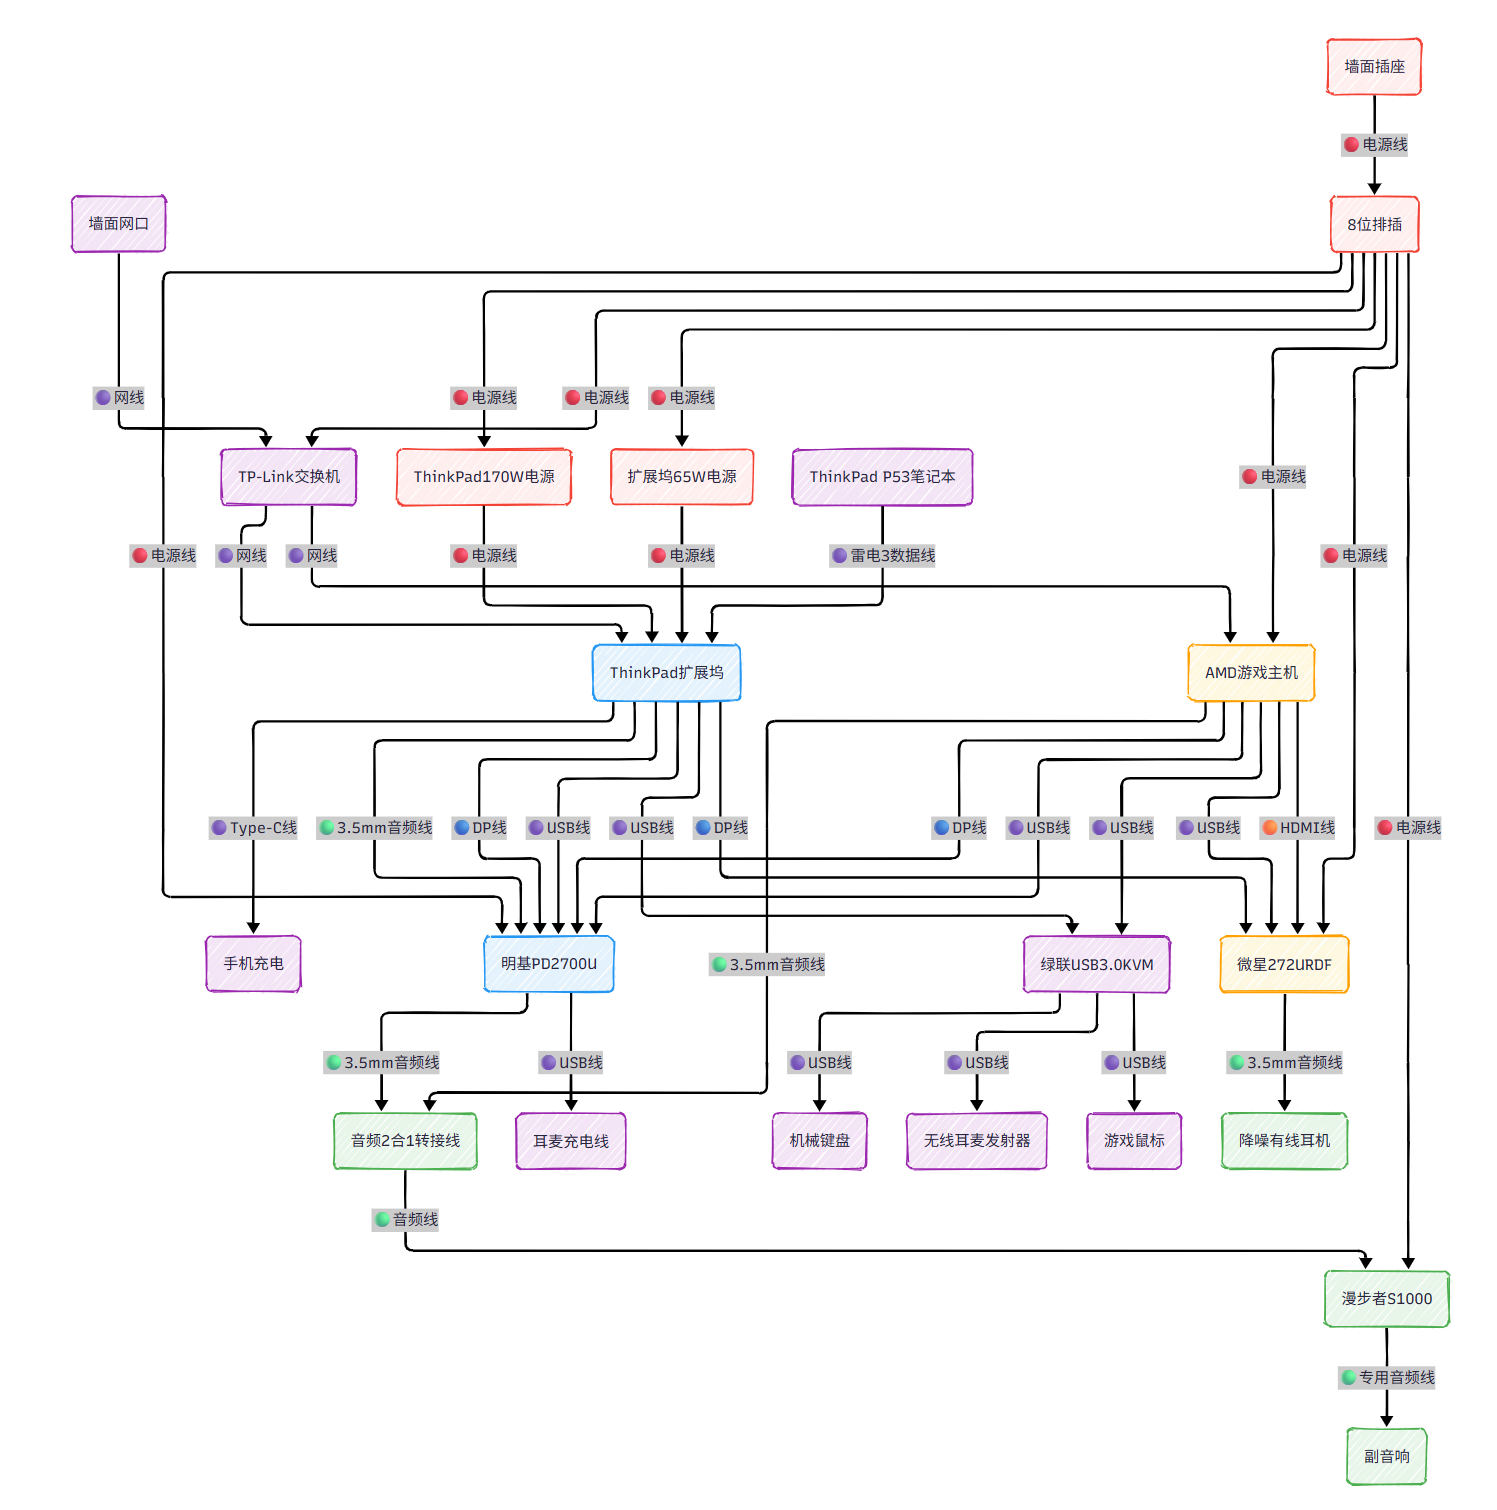
Additionally, the room only has four wall outlets behind the monitor. Other devices like desk lamps, fans, and chargers for phones and tablets have to draw power from these outlets, with extension cords running across the desk, making everything look even messier.
The Makeover
With so many cables—especially those needing to pass between the desktop and under-desk areas—the first step was drilling holes in the desk.

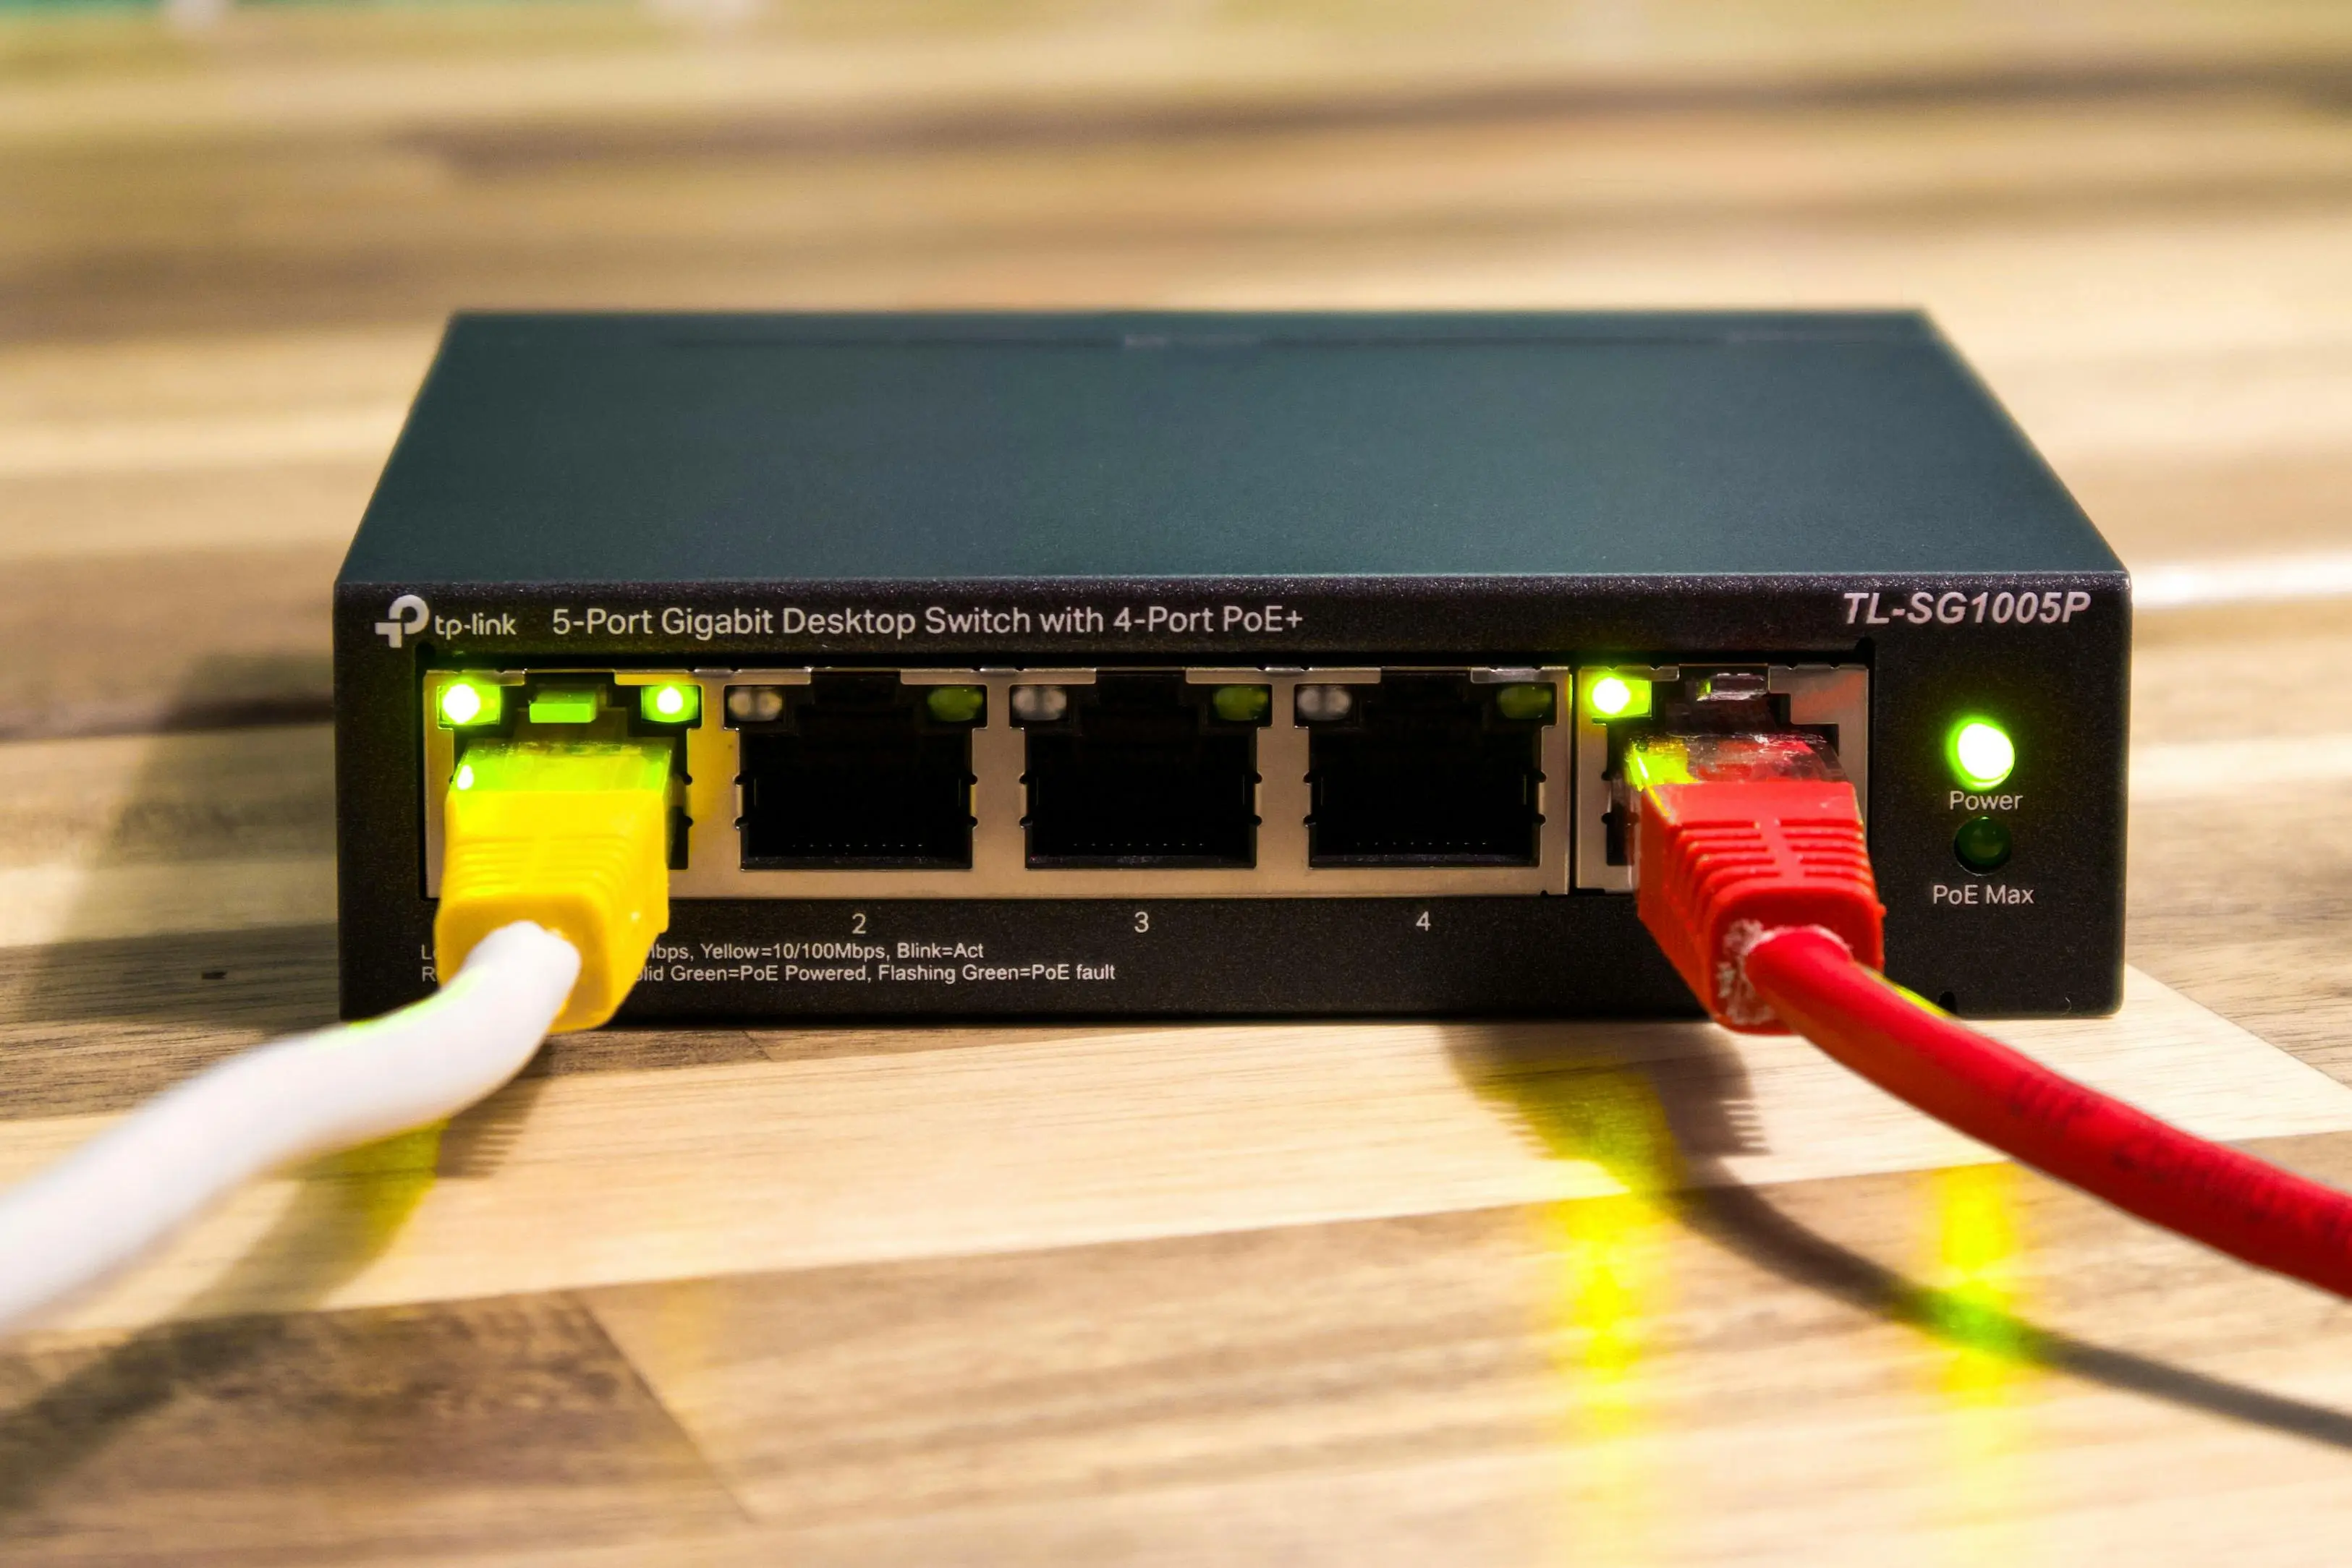
I bought a 6-piece hole saw set for ¥10 on JD.com and drilled four holes to route cables underneath. Then, I installed several under-desk cable management trays using screws and stuffed all the devices—laptop power supplies, power strips, switches, KVM switches—under the desk.
However, due to the sheer number and variety of cables (thick, thin, long, short), and the limited space in the cable trays, it was nearly impossible to keep things tidy. In the end, I just crammed everything in haphazardly.
Creating Flowcharts
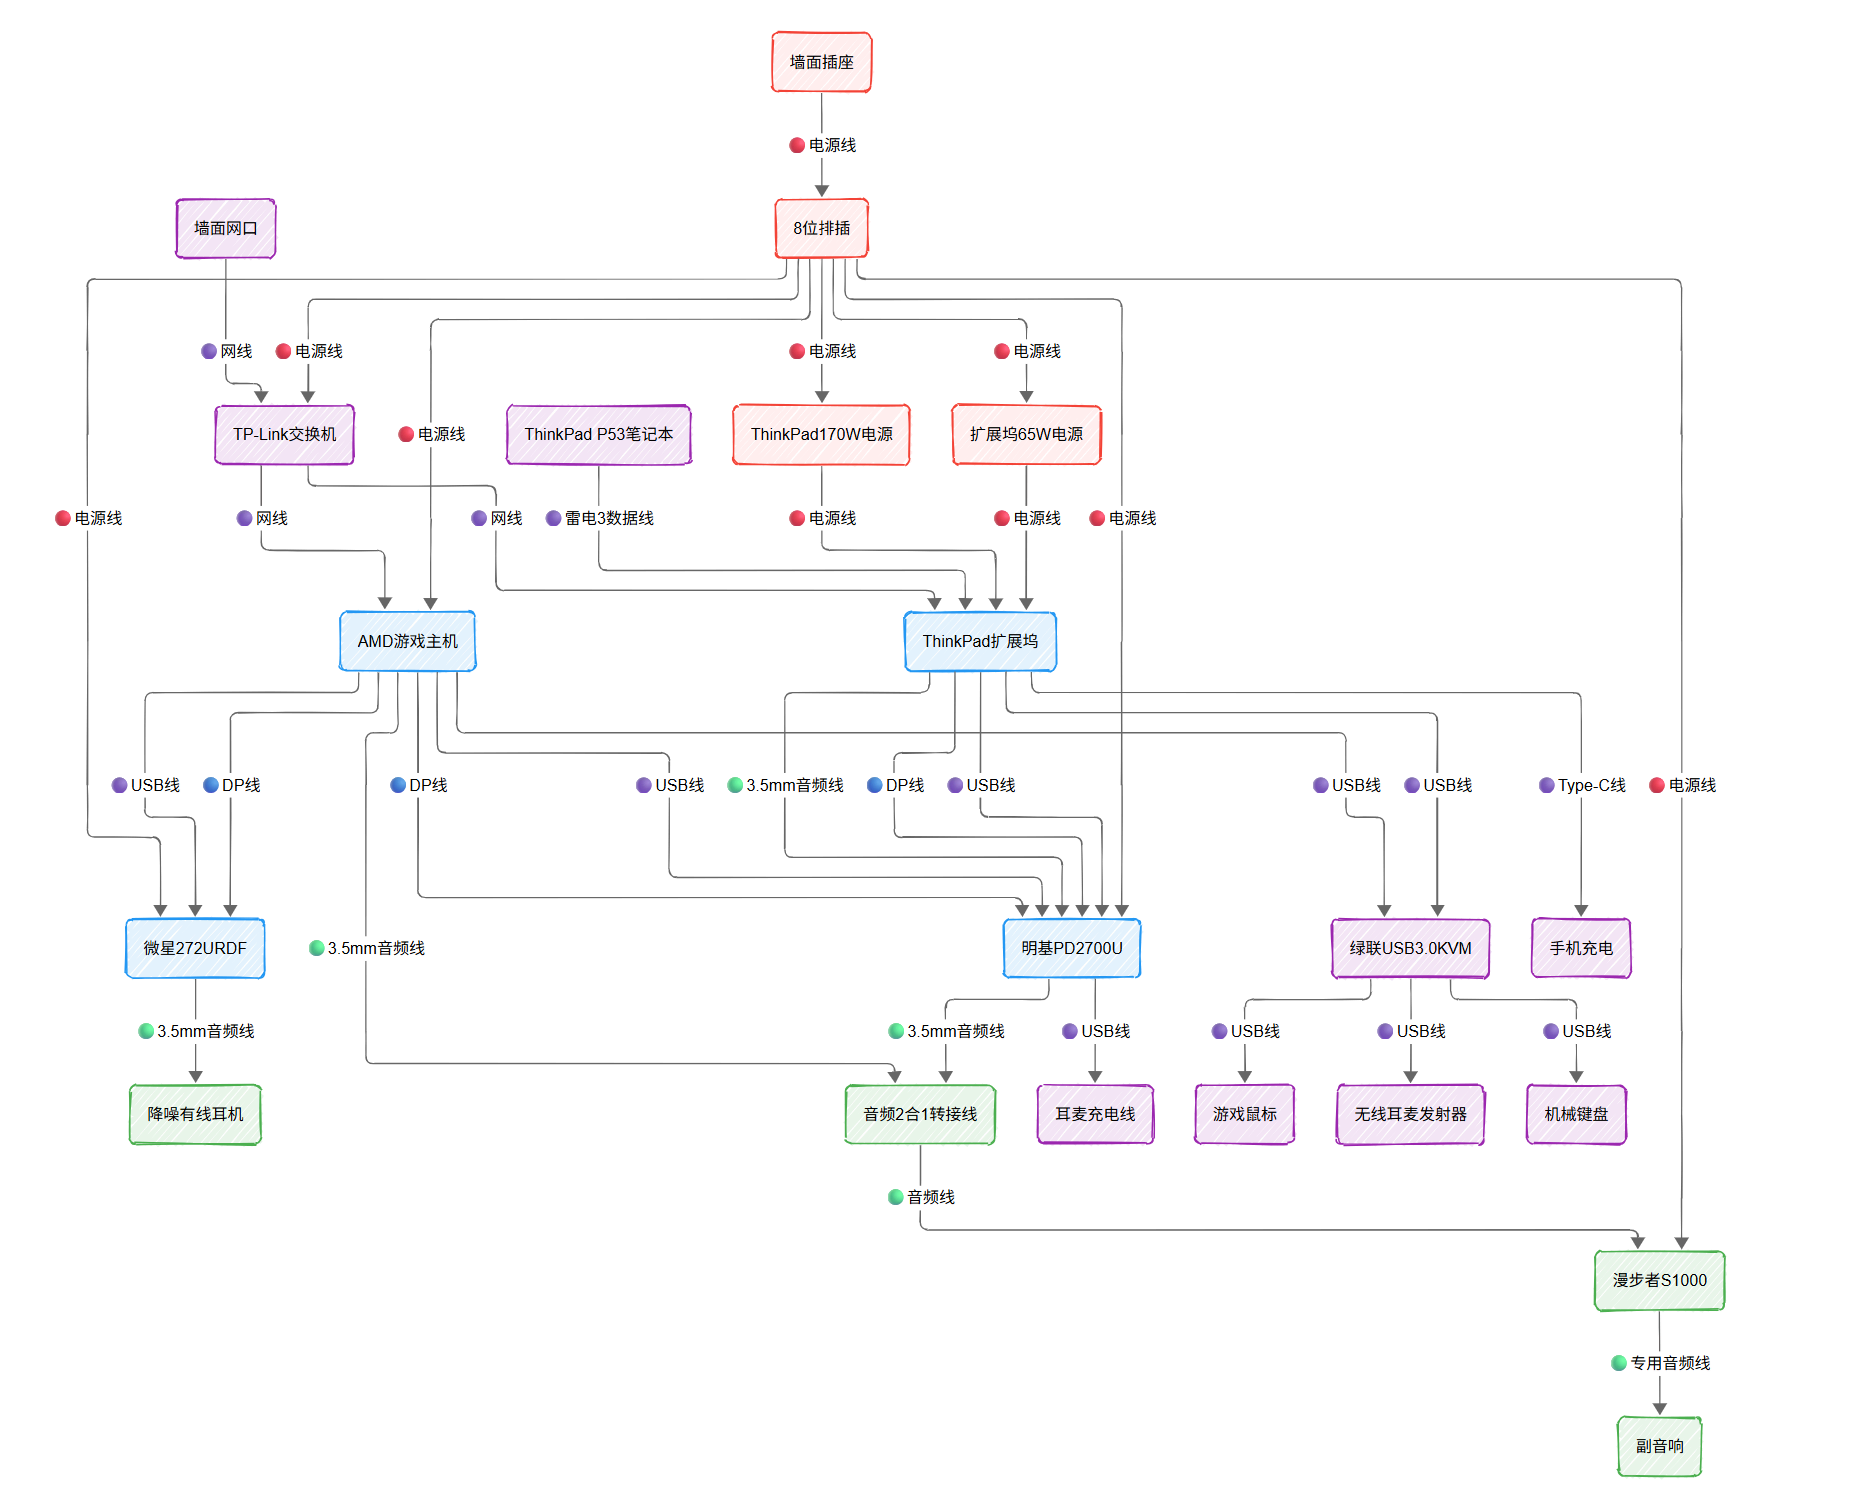
While working on the diagrams above, I found that using AI with Mermaid to create flowcharts was much easier than drawing them manually. Mermaid’s official website also offers many rendering templates. The only downside is that the Hugo Theme Stack used for this blog doesn’t natively support Mermaid rendering. Since I rarely use it, I didn’t bother tweaking it and just took screenshots instead.
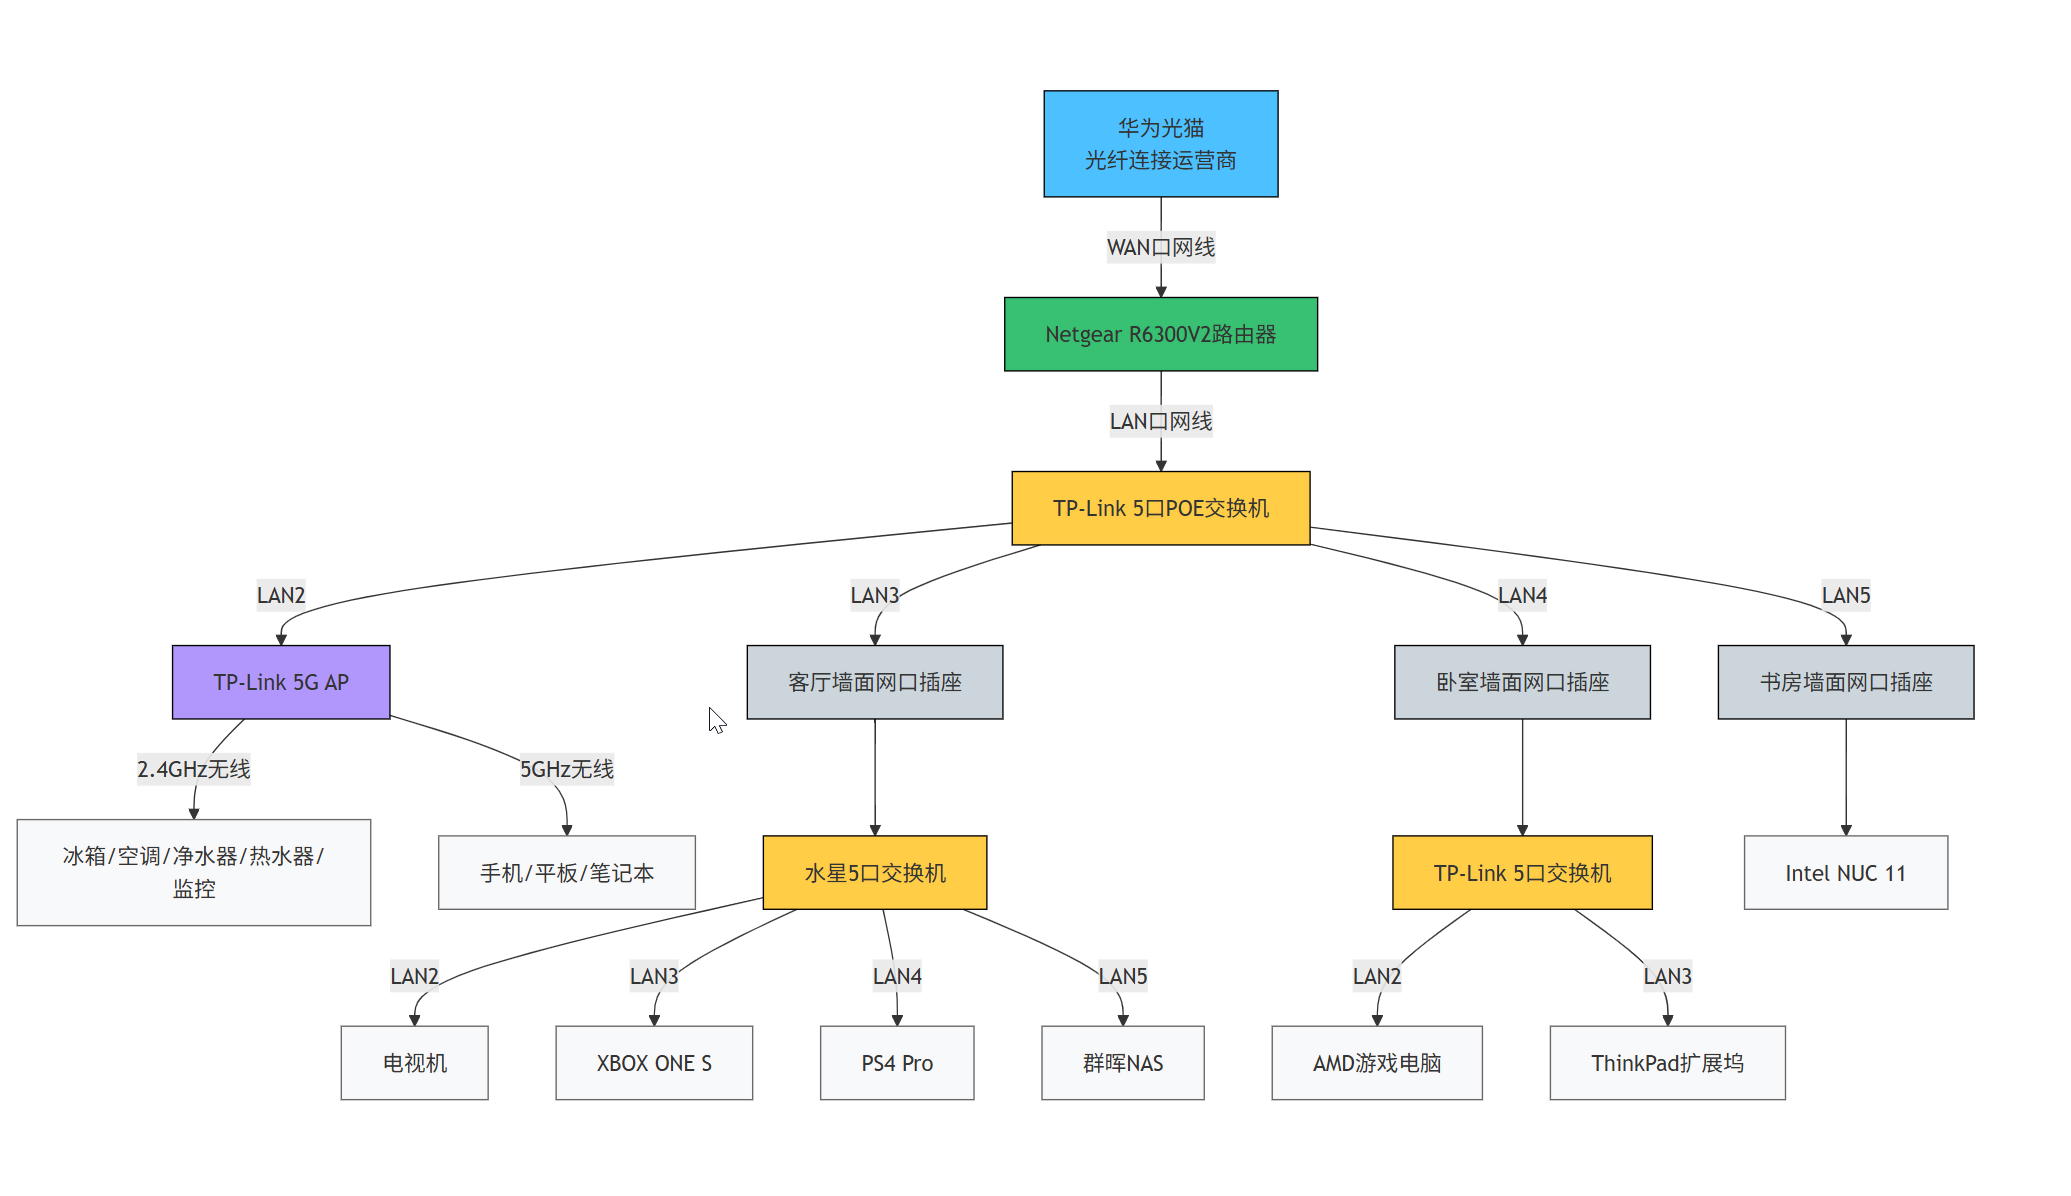
I also took the opportunity to create a home network topology diagram.