
A few days ago, I wrote an article about Batch Converting Images to WebP in Hugo , but one issue remained unresolved: the source of WebP images.
Since Windows’ GDI tools only support formats like JPG and PNG by default, there isn’t a straightforward way to directly save screenshots as WebP on Windows. Therefore, I’ll briefly share my personal experience here.
Third-Party Screenshot Tools + Third-Party Conversion Tools for Automatic Saving
In the comments of the article mentioned above, someone mentioned:
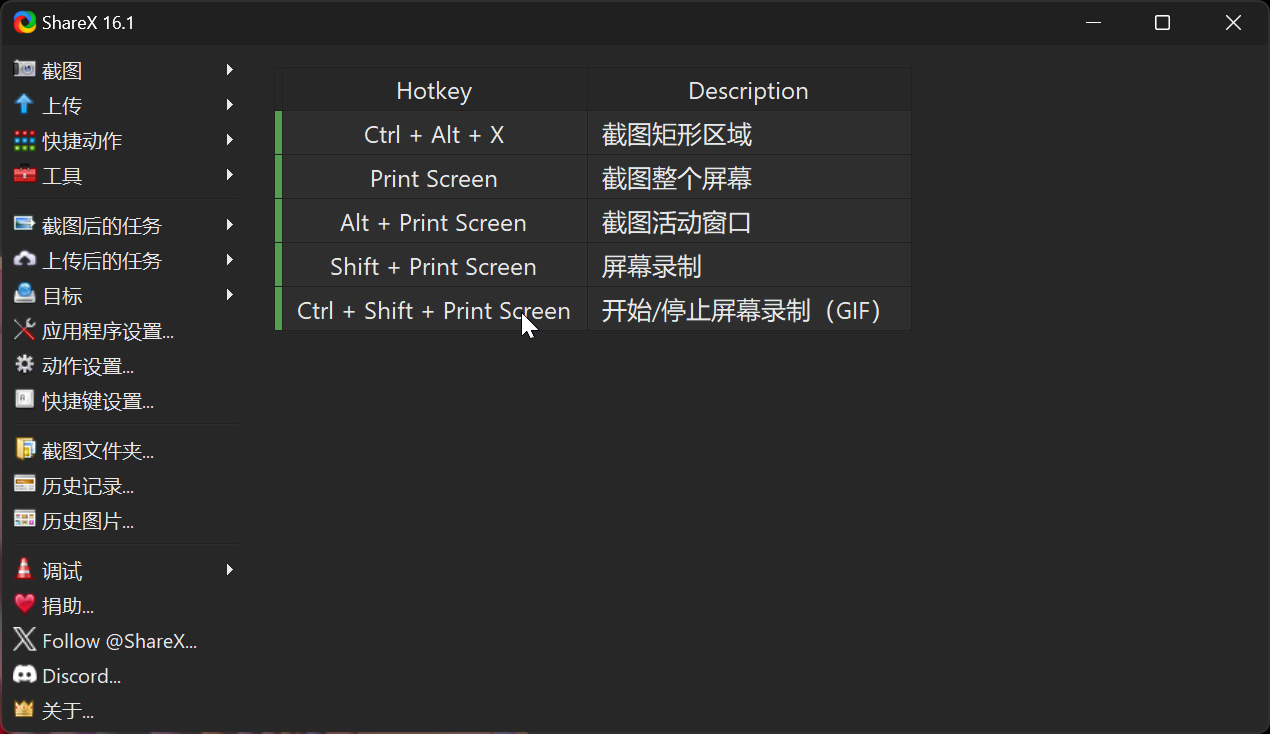
I don’t have good image processing software on my computer, so I usually rely on screenshots. After writing this article, I searched for WebP screenshot software but couldn’t find any. It seems you need to use two tools to achieve this. One method involves using ShareX (a screenshot tool) + ImageMagick (a conversion tool), where ShareX’s built-in automation is used to call ImageMagick.exe to automatically convert to WebP. Another method uses Greenshot (a screenshot tool) + ImageMagick (Mogrify), following the same principle of calling Mogrify.exe during the screenshot process to automatically convert.
The two methods mentioned above can be found at the following links:
Method 1: https://limour.xlog.app/WEBP-jie-tu-gong-ju-ShareX--imagemagick?locale=zh
Method 2: https://github.com/greenshot/greenshot/issues/347
First, let’s download the necessary tools:
1- Run-Hidden (it will allow us to carry out the entire process transparently, without showing any window) https://github.com/stax76/run-hidden/releases/tag/v1.2 2- Mogrify (will convert our JPG screenshot to WEBP) https://imagemagick.org/script/download.php#windows we must unzip both zip files, in my case, I use the “E:\util” folder. Next, we need to configure GreenShot: Right click on GreenShot Tray Icon -> Preferences… -> Extensions -> External command Plugin -> Configure -> New Name: WEBP (Mogrify) command: E:\Util\run-hidden.exe argument: cmd.exe /c E:\Util\mogrify.exe -strip -format webp -quality 90 “{0}” & del “{0}” https://i.ibb.co/K7hQgXK/2023-08-08-15-34-25-Window.jpg Note that both “run-hidden” and “mogrify” must be well indicated, in my case I use “E:\util”, but it could be any other folder.
Windows Built-in Screenshot + Third-Party Conversion Tools for Automatic Saving
Here, I’ll focus on how to use Windows’ built-in screenshot tool combined with a third-party conversion tool to automatically save screenshots as WebP. After all, the fewer software installations on your computer, the better.
This method also requires ImageMagick support. (After all, apart from Google’s cwebp, ImageMagick is the most commonly used conversion tool.)
Step 1: Download and Install ImageMagick
- Visit the ImageMagick official website .
- Download the installer suitable for your system (Windows version) and follow the prompts to complete the installation.
Step 2: Write a Batch Script
Create a Batch Script:
Open Notepad or another text editor.
Enter the following content:
@echo off
set "source_dir=C:\Users\xxxxx\Pictures\Screenshots"
set "magick_path=C:\webp\magick.exe"
for %%f in ("%source_dir%\*.png") do (
    "%magick_path%" "%%f" "%%~dpnf.webp"
    del "%%f"
)
Make sure
source_diris your Windows default screenshot folder, and ensuremagick_pathpoints to the actual path ofmagick.exein the ImageMagick installation directory.
Save the Batch Script:
- Save the file as
webp.batin a location that’s easy for you to find.
- Save the file as
Step 3: Set Up Windows Task Scheduler
Open Task Scheduler:
- Press
Win + Rto open the Run dialog, typetaskschd.msc, and press Enter, or search for “Task Scheduler” in the Start menu and open it.
- Press
Create a Basic Task:
- In the Task Scheduler window, click “Create Basic Task” on the right.
- Enter a task name (e.g., “webp”) and click “Next”.
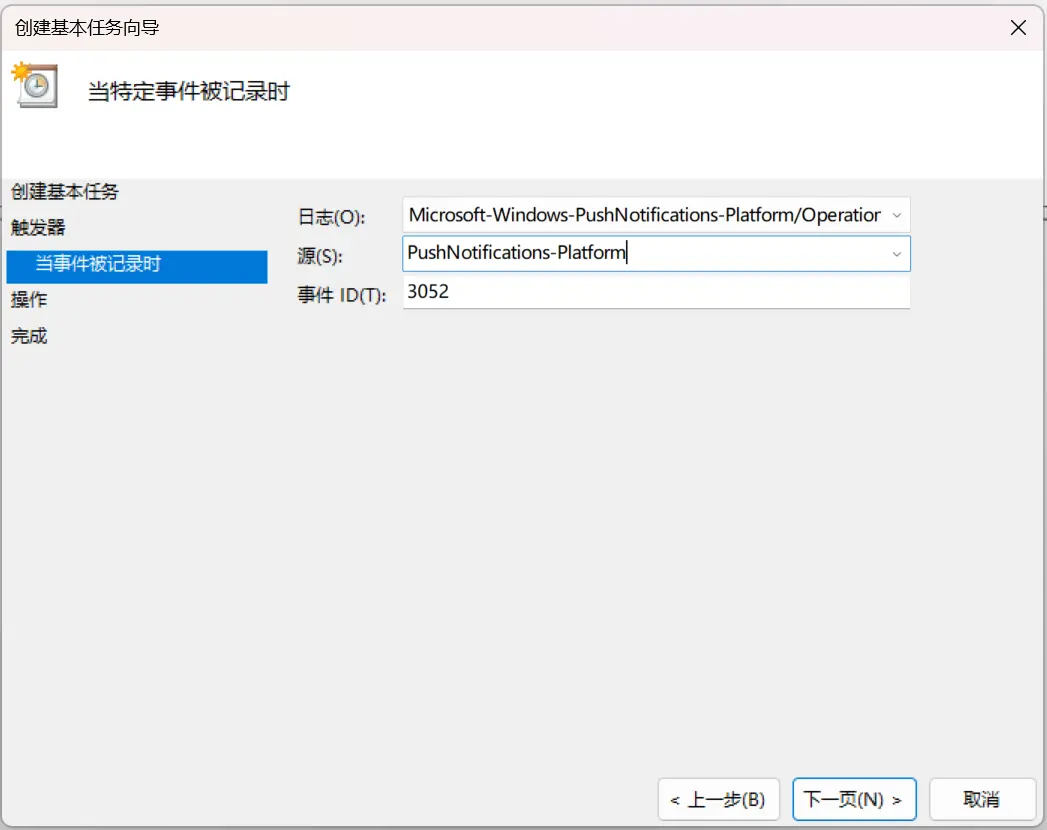
Set the Task Trigger:
- Select “When a specific event is logged”.
- Choose the log “Microsoft-Windows-PushNotifications-Platform/Operation”, fill in the source as
PushNotifications-Platform, and the event ID as3052.
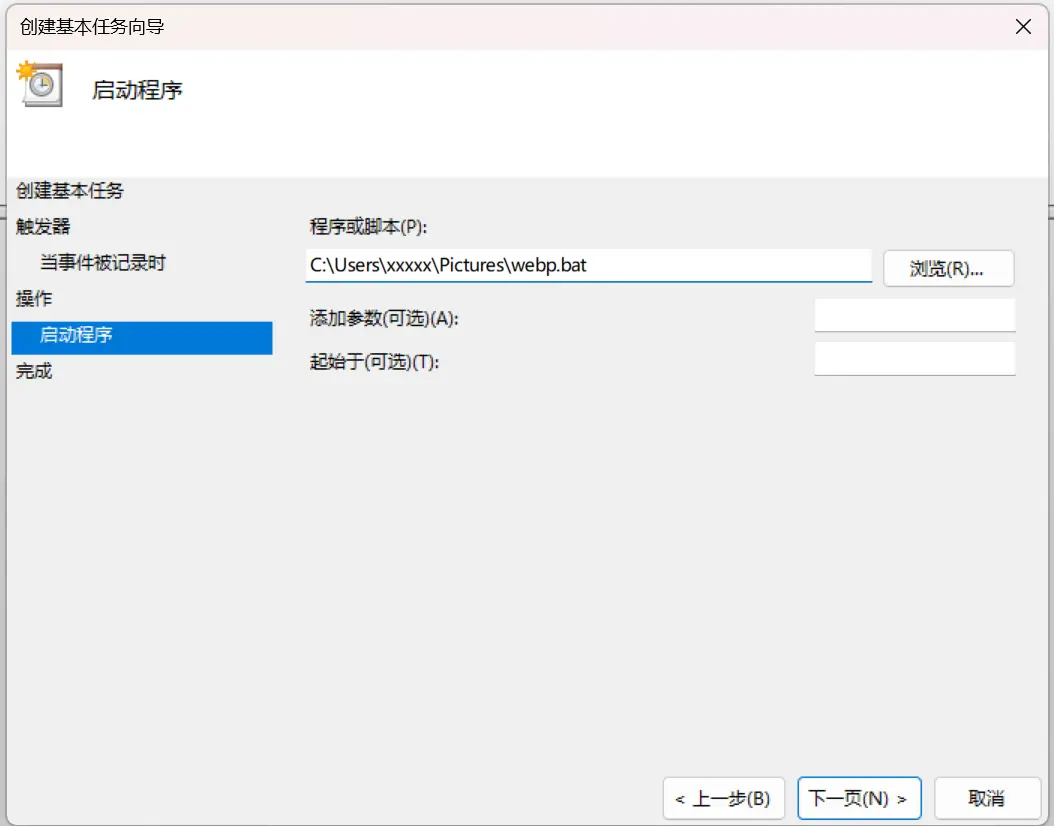
Set the Action:
- Select “Start a program” and click “Next”.
- In the “Program/script” field, click “Browse” and select the
webp.batfile you created earlier. - Click “Next”.
Complete Task Creation:
- Review the task summary to ensure everything is set correctly.
- Click “Finish” to create the task.
The Task Scheduler will automatically run the batch script every time you use the Windows built-in screenshot shortcut
Win + Shift + S(or you can change it to thePrintScreenkey in Windows settings).
Notes
Ensure Your Task Trigger is Set Correctly Press
Win + Rto open the Run dialog, typeeventvwr, and press Enter to view the system logs. Navigate toApplications and Services Logs -> Microsoft-Windows-PushNotifications-Platform/Operation. Under normal circumstances, with Windows notification services enabled and the Windows built-in screenshot tool’s notification feature turned on, each time you press the Windows screenshot shortcutWin + Shift + S, a notification event will be generated. Ensure the event ID generated on your computer matches the one entered above.
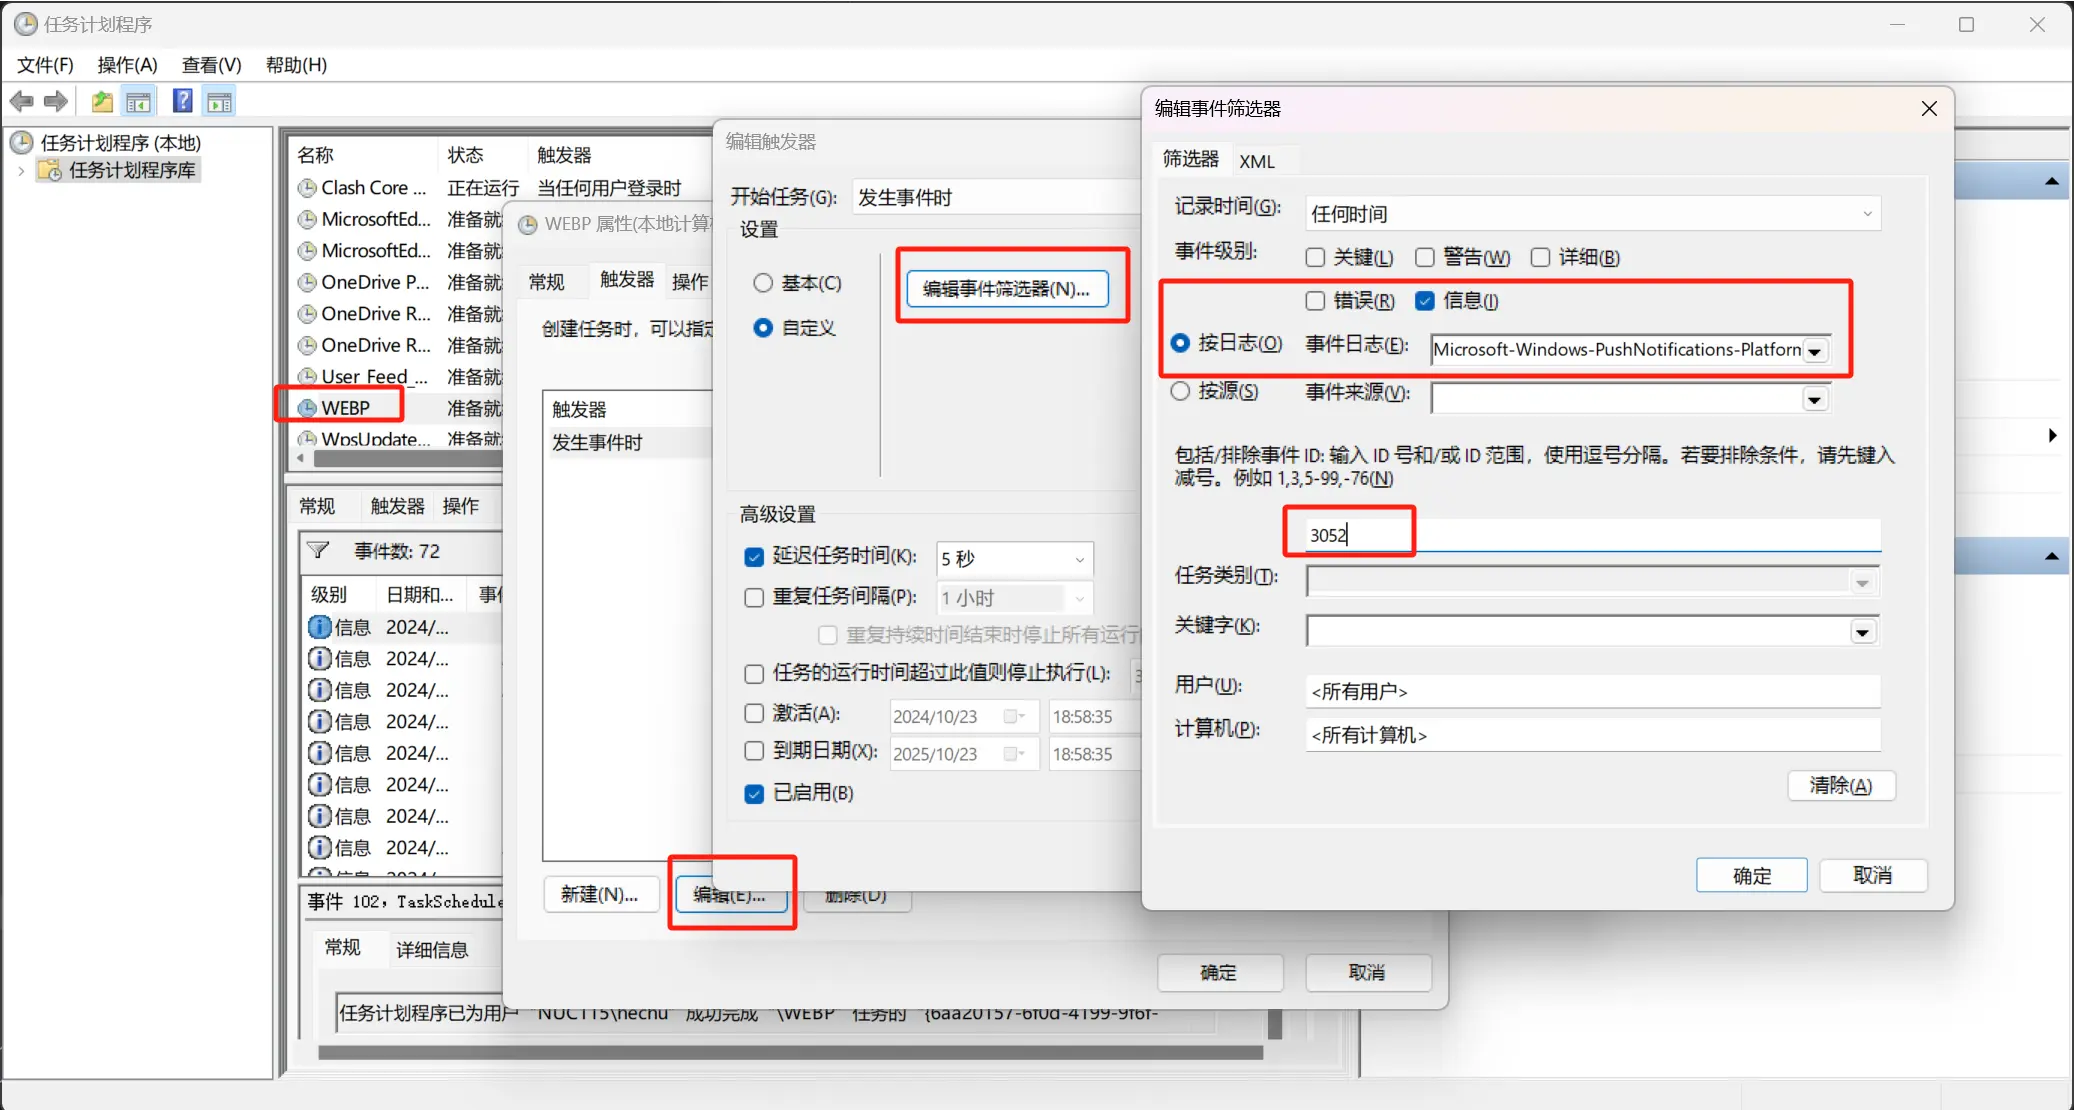
If Automatic Setup Fails, Choose Manual Setup Double-click the task you just added, select “Triggers -> Edit -> Edit Event Filter”, check “Information”, and select the log and enter the event ID.
Add Support for Other Image Formats Modify the batch file content in Step 2 to add support for other formats. For example, common formats like JPG and JPEG can also be automatically batch-converted.
  @echo off
set "source_dir=C:\Users\xxxxx\Pictures\Screenshots"
set "magick_path=C:\webp\magick.exe"

:: Process PNG files
for %%f in ("%source_dir%\*.png") do (
    "%magick_path%" "%%f" "%%~dpnf.webp"
    del "%%f"
)

:: Process JPG files
for %%f in ("%source_dir%\*.jpg") do (
    "%magick_path%" "%%f" "%%~dpnf.webp"
    del "%%f"
)

:: Process JPEG files
for %%f in ("%source_dir%\*.jpeg") do (
    "%magick_path%" "%%f" "%%~dpnf.webp"
    del "%%f"
)
If you need to perform more editing operations after taking a screenshot, you can manually set a delay of 30 or 60 seconds in the task trigger. Since I currently use a download + screenshot mode, I just dump everything into a folder and press the
PrintScreenkey to automatically convert everything. (This might leave an extra screenshot, but it doesn’t cause any issues.)